make your own door panels
I was tired of the very tired and very old looking door panels in my Mini. I was looking to not only update the look of the car but also add a custom touch to the car. I decided that I was going to make my own door panels. They couldn't be that hard to make. I cut the panels out of an 8'x4' sheet of 1/8" hardboard.
Note: Although I borrowed a family member with an extensive wood working background, the panels are extremely simple in design and creation. Anyone with a handsaw or two and a drill can make these. The hardboard is easy enough to cut and sand and the shape is not complicated.
Note: Although I borrowed a family member with an extensive wood working background, the panels are extremely simple in design and creation. Anyone with a handsaw or two and a drill can make these. The hardboard is easy enough to cut and sand and the shape is not complicated.
removing the panels
1. Remove the original doorpanels from the doors. There are 9 clips that hold the door panel to the door. They are fairly evenly spaced aroud the sides and bottom of the panel. Be careful not to break the clips or damage the panel. It's best to go slow. Follow the panel until you find the clip and then pry out right around the clip. Luckily if you break a clip (and I did many), you can still purchase replacements from suppliers like 7 Enterprises.
2. Removing the rear panels couldn't be easier. There are no clips holding the rear panel in, simply a tight fit. Find a convenient place to grab hold and just pull the panel out. It is held in by a channel at the top, the rear seat at the back and the cubby on the bottom.
2. Removing the rear panels couldn't be easier. There are no clips holding the rear panel in, simply a tight fit. Find a convenient place to grab hold and just pull the panel out. It is held in by a channel at the top, the rear seat at the back and the cubby on the bottom.
cutting the panels
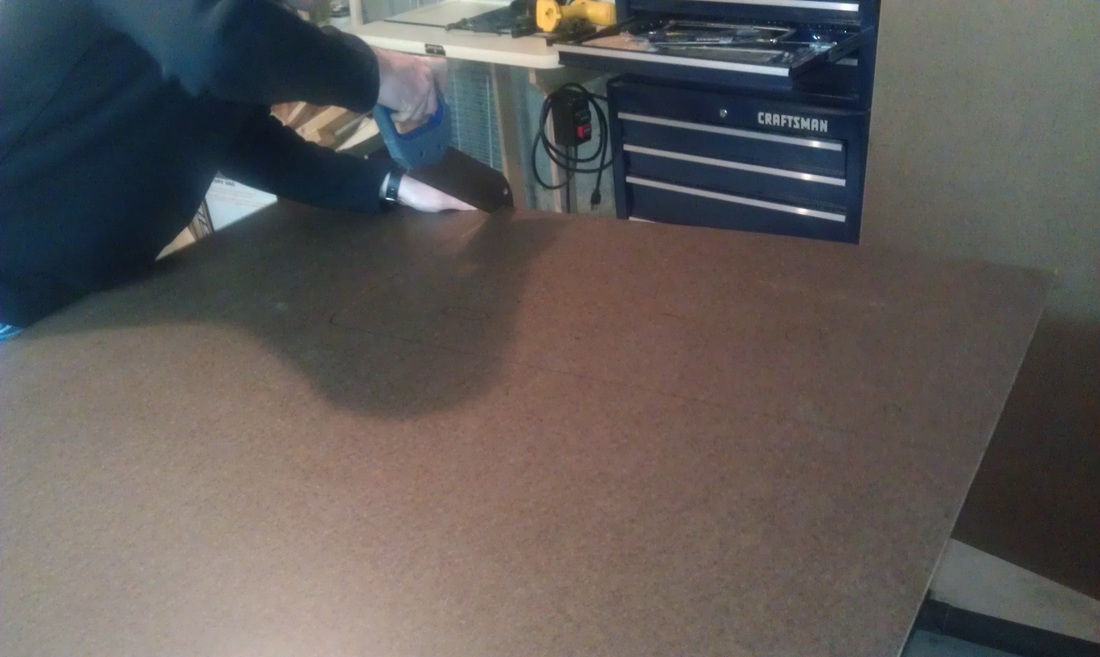
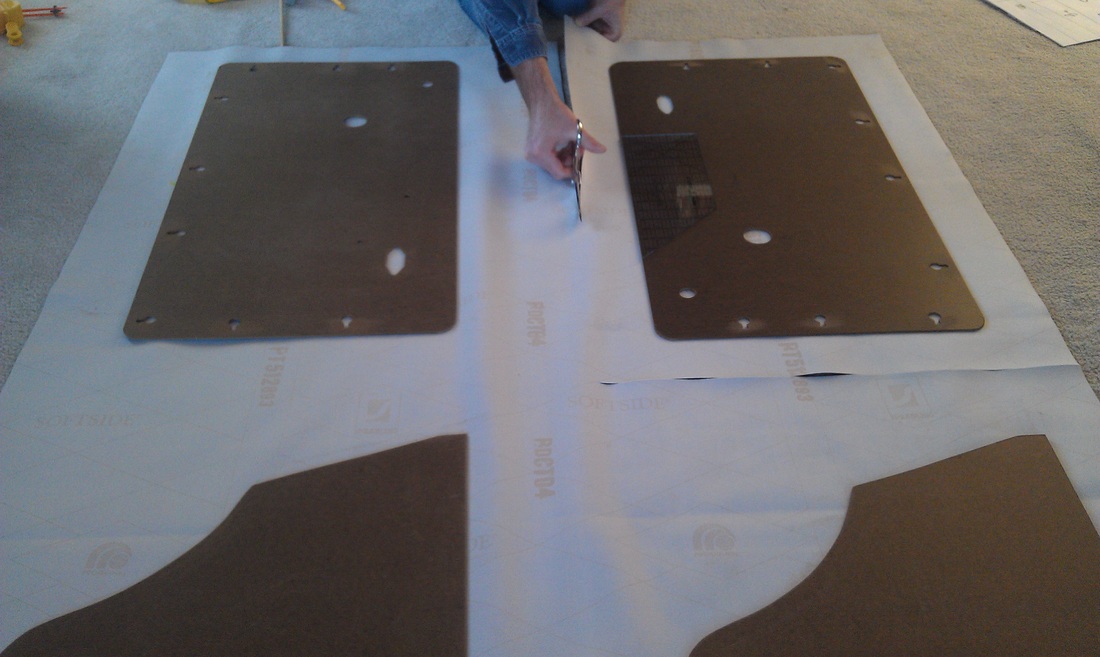
1. Place the old panel on top of the hardboard and clamped it into place.
2. Trace the outline of the old panel onto the wood. Also make sure to trace the holes you will need to cut in the new panel. It is also important to mark the holes for the door panel clips. We used a center punch to mark the location of the holes onto the new panel. It's only important to mark the little holes around the edge and not the larger ones.
3. We cut the wood with a table saw to get the basic square shape, and then used a little hacksaw and sandpaper to shape the rounded corners.
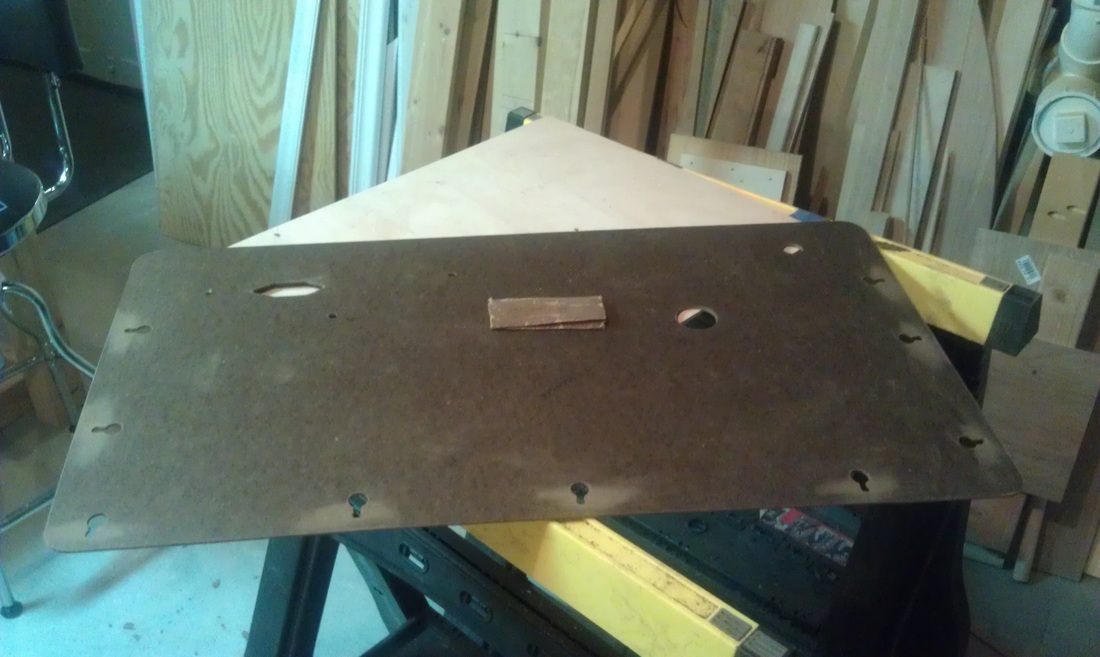
4. There are several holes in the panel that need to be cut out:
a. Window Crank Hole: We used a 1 3/4" drill bit for that hole
b. Door Handle Hole: We used a 7/8" drill bit for that hole
c. Door Pull Holes: We used a 3/8" drill bit for that hole
5. The hole for the door lock is a little more complicated. We used a couple different drill bits to cut out the majority of the hole. We then used a key hole saw with a wood blade to cut out the basic shape. Files and sandpaper took care of the finishing touches.
6. The last holes to drill are the ones for the door clips. The design is based around 2 holes; a large one that allows you to insert the clip and then a smaller hole that the clip slides into a holds it into place. We drilled the smaller holes first using a 5/16" drill bit. Once they were drilled, we used a 5/8" drill bit to drill the larger hole. We then used the key hole saw to cut out the material between the 2 holes. We used a clip to test fit each of the holes. We used a file and sandpaper to make the chanel between the holes perfect. We also found that the hardboard was just a tiny bit too thick so we sanded each side of the hardboard near the holes to make the fit perfect.

Drilling the holes
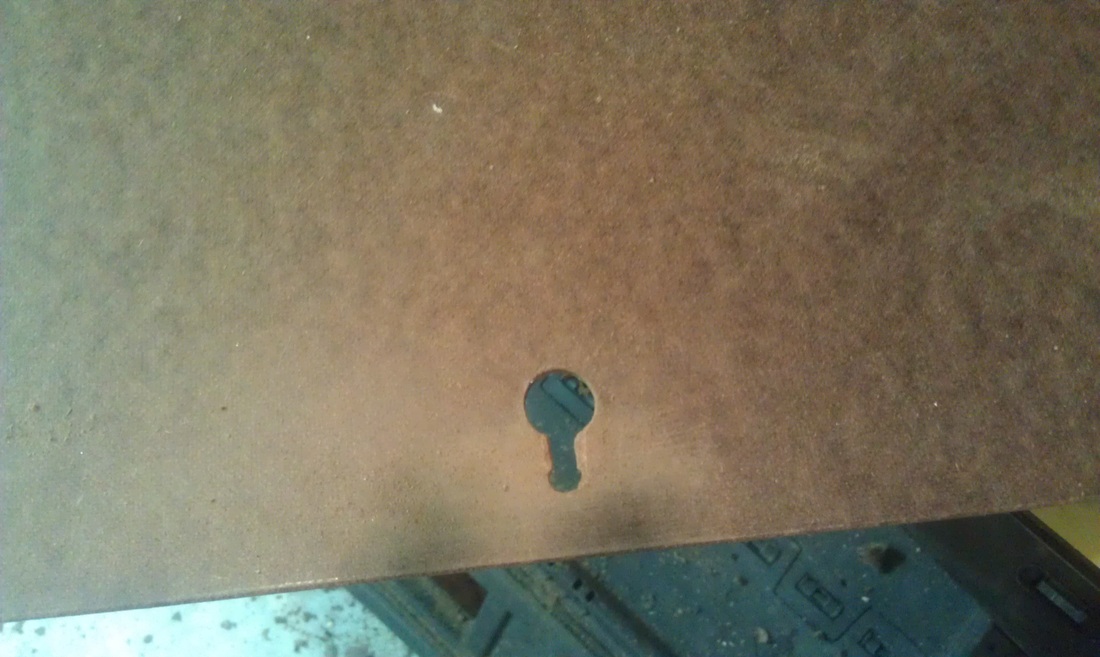
This is a hole for the trim clip. You can see the 2 different size holes we needed to drill and the marks left from sanding
Here's the finished product:
7. Cutting the rear panels is a little more straight forward. Again, clamp the old panel onto the new panel and trace it. There are no holes to drill in the rear panels so just be patient and use a combination of saws to get the panels cut and then sandpaper and files to make it smooth.
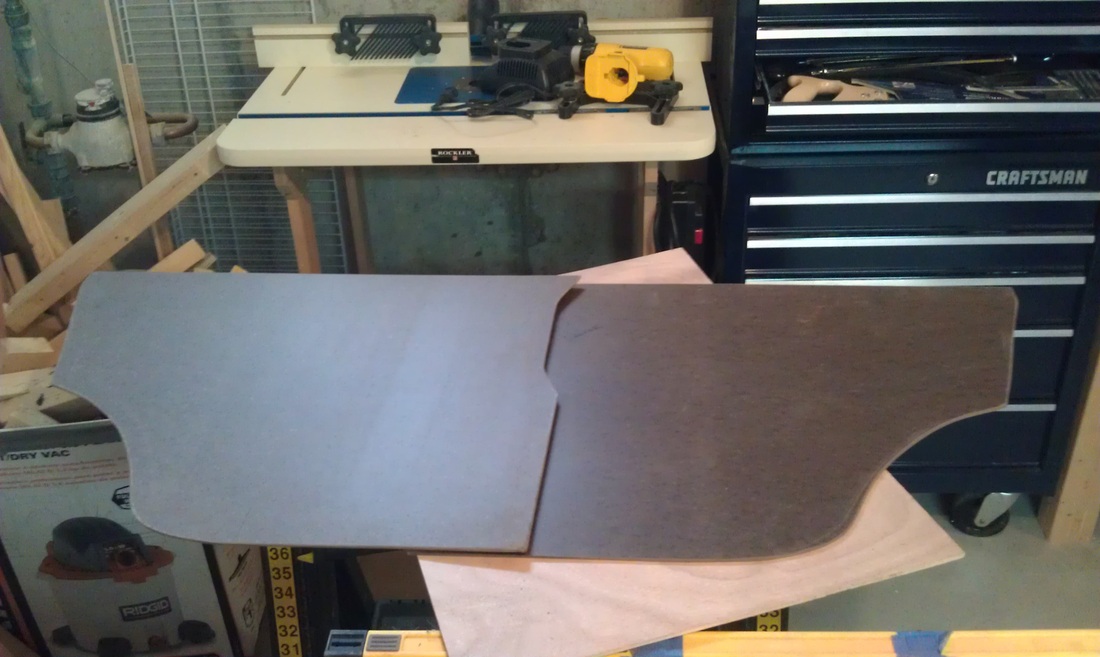
Finished rear panels
creating your design
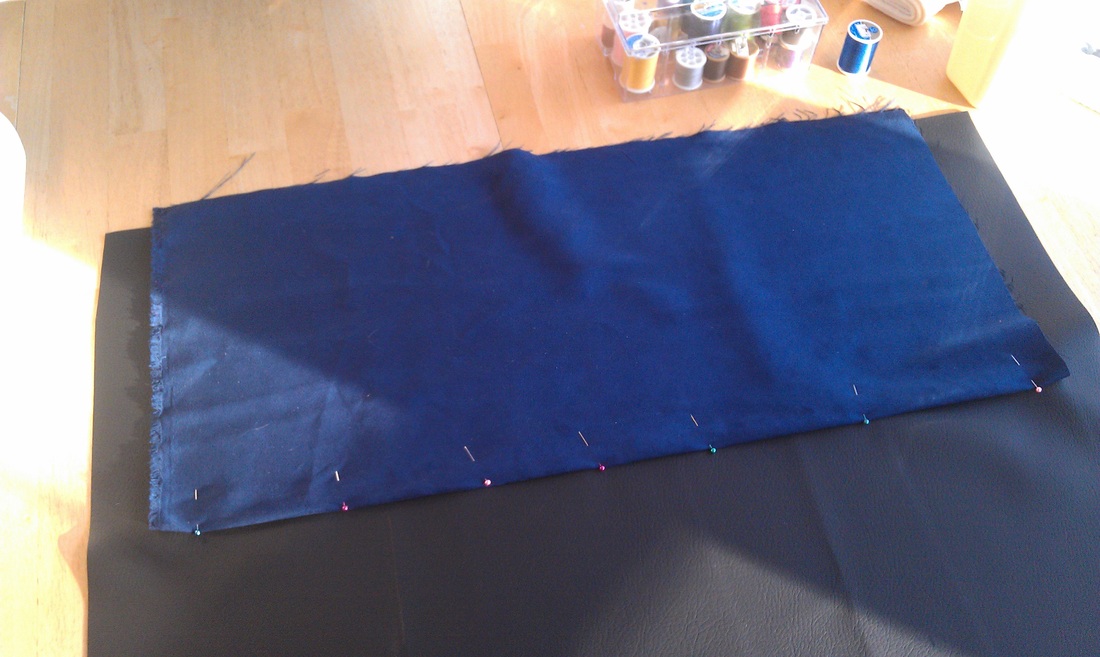
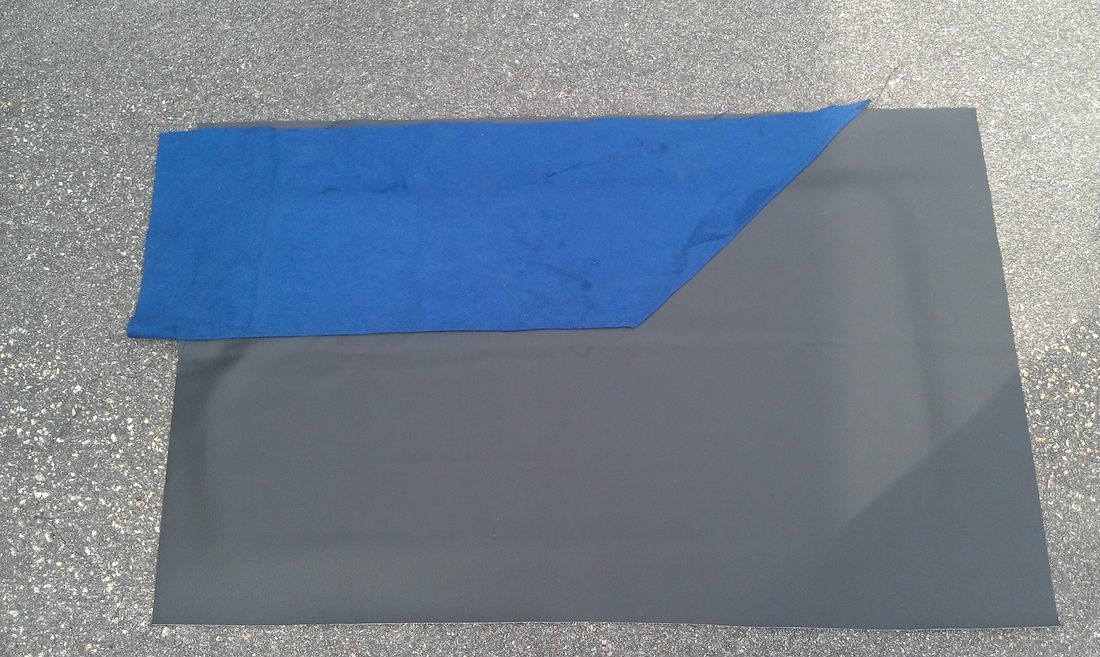
I can't really tell you how to make your covers. I used leather and suede. Depending on your skill level with a sewing machine and foam, you can make any number of designs. I went with a very simple design: suede on top, leather on the bottom. I was going to sew in some lines to make it a little more dimensional, but in the end, my lack of sewing talent ruled that out. I also used something called "headliner material" to add some padding to my panels. I also used cans of headliner adhesive in spray cans.
1. I laid the panels out on the ground and cut leather to fit
1. I laid the panels out on the ground and cut leather to fit
2. After cutting the leather we cut the suede to fit. We then pinned the two materials together and got to sewing
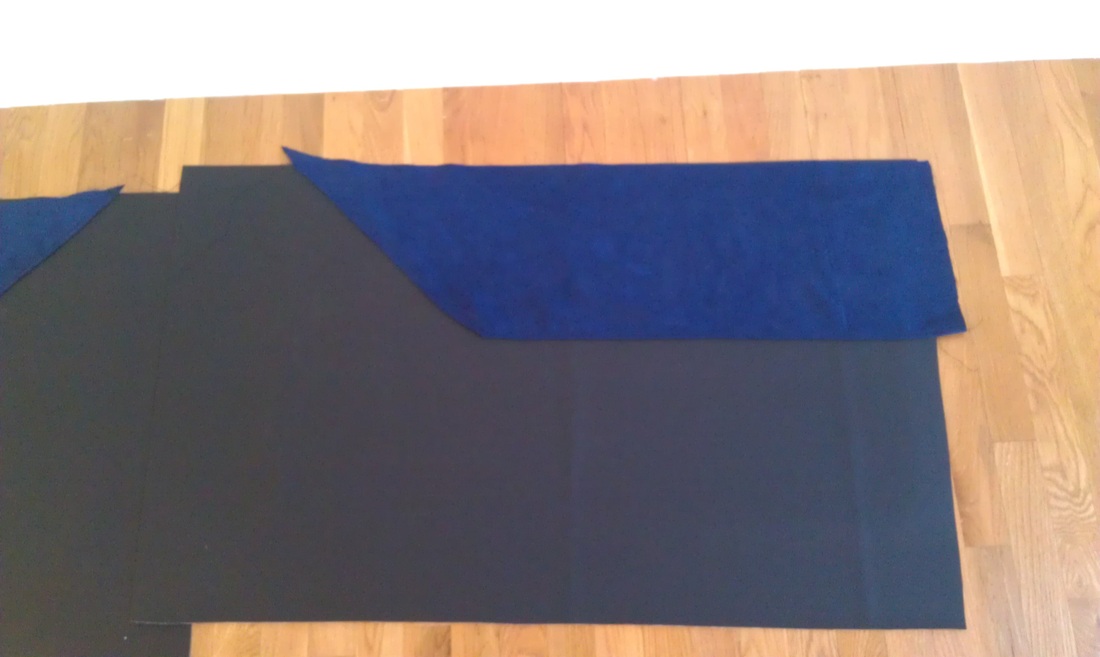
3. After we had ran some thread around the two fabrics, we were left with the final design. We made them very large to make sure we had some excess at the edges to a) fold over and b) ensure we could get the position of the fabric on the panel just right.
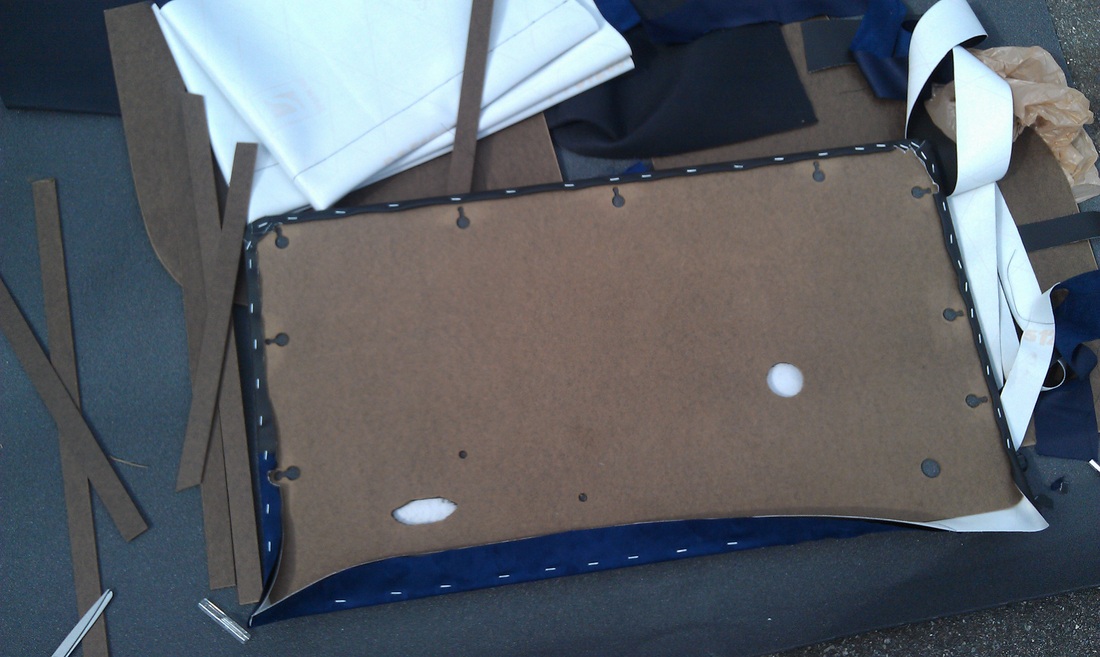
4. The next step was to attach my headliner material to the door panel. I made sure to not get the material too close to the edge as it might get in the way when wrapping the material. Just spay both the panel and the headliner material with the glue.
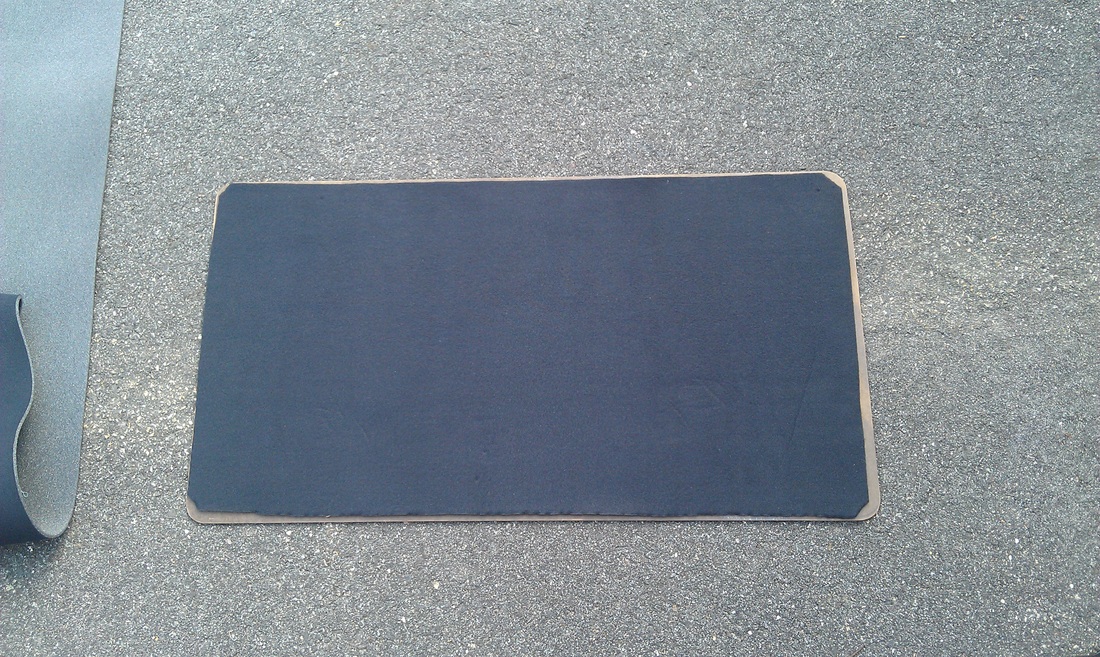
5. Next step was to line up my design with the door panel and glue it in place. After carefully lining everything up until I was happy, I applied glue to the panel and to the design. I did it one half at a time so as not to mess up my alignment.
6. After the glue had dried, it was time to flip it over and start wraping. The original door panels made little use of staples. I was not very confident in the glue that I had purchased and made merry with the staples.
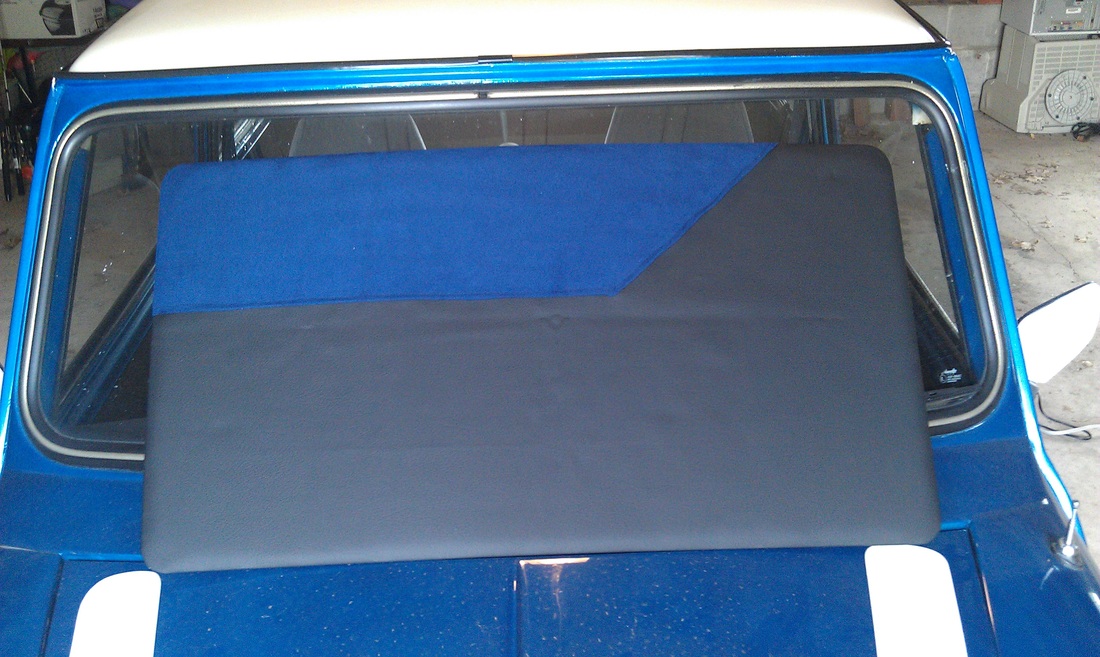
The wrapped panel on my Mini
7. The final step was to cut out the holes for the door lock, the door handle and the window crank.
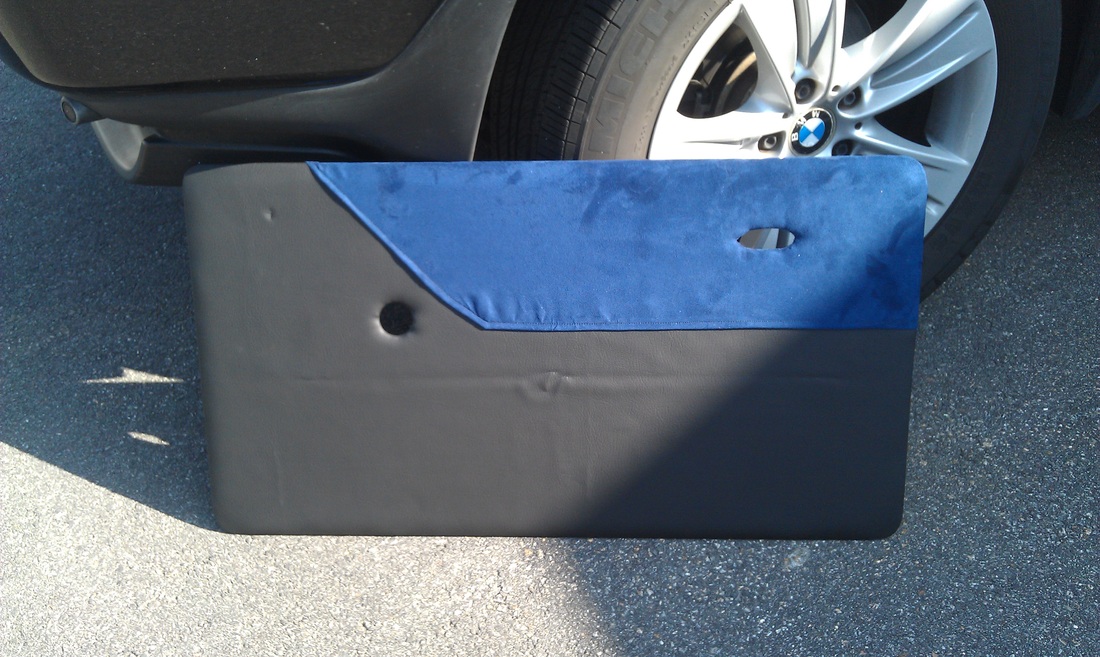
Holes cut out and the panel leaning on the neighbor's car
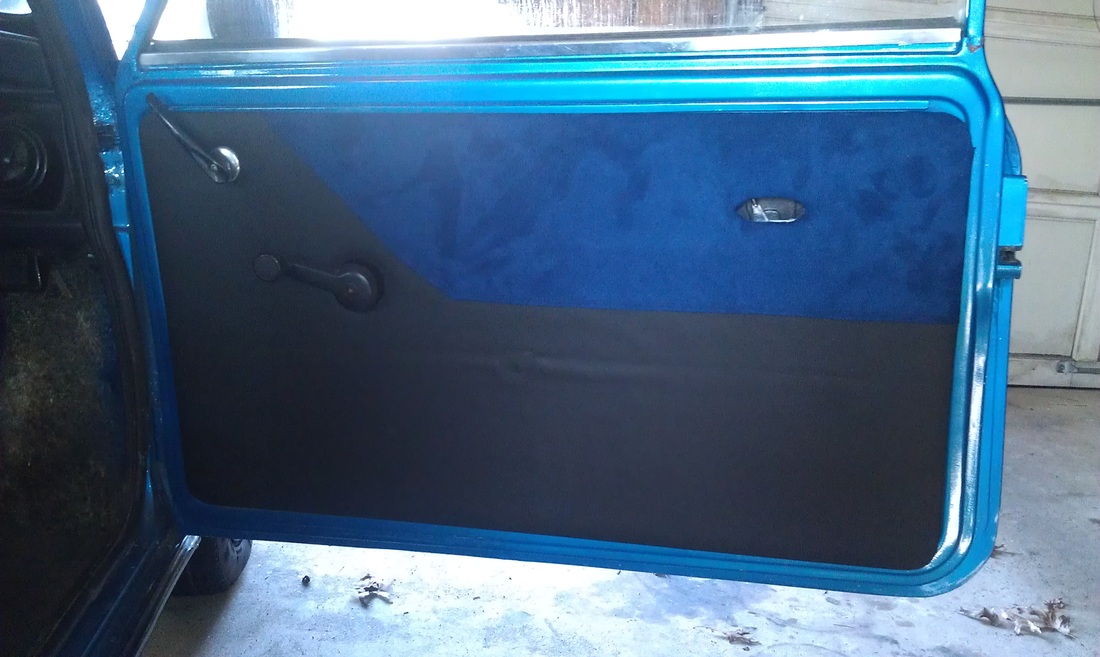
Test fitting the driver's door

Final fitting on the passenger door
This is an original tutorial from http://classicmini.weebly.com
