installing a new dashboard
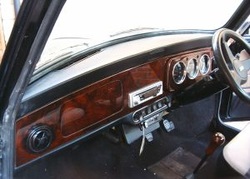
There are various finishes available on the Mini dashboards, the two popular finishes are alloy and walnut. The dashboards totally transform the interior of the Mini, they all have a glove box and radio housing and are available for the two or three clock dials. Converting from a two clock to a three clock instrument cluster is covered within these instructions. Additional gauges can be fitted if required and the dashboards are available with 0, 1 or 3 gauge housings.
How to Fit
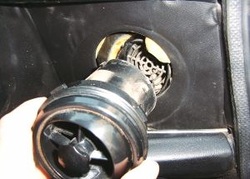
1. Disconnect the battery before starting. Remove the two air vents from the existing dash. There is an outer ring to unscrew, the shroud and finally twist the air vent to detach it from the bulkhead.
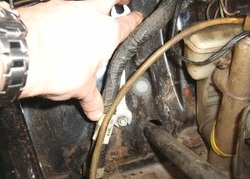
2. Remove the existing instrument cluster. This involves two bolts on either side of the cluster internally, removing the speedo cable and electrical connections and four bolts from the bulk head to release the brackets.
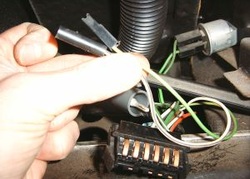
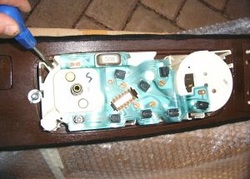
3. If you are converting from a two clock instrument cluster to a three clock cluster you need to find two additional wires. The wires should already exist and will look like those pictured, one with a round (bullet) connection and the other with a flat spade connection.
4. The additional wires will plug into the back of the rev counter on a three clock cluster. The remaining electrical connection and speedo attachment are the same.
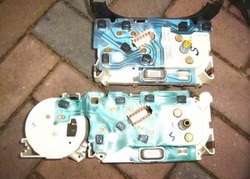
5. Fix the instrument cluster to the new dashboard. Place the dashboard into position and reconnect the speedo cable and all electrical connections.
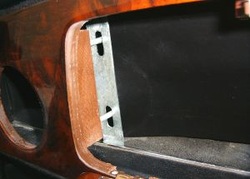
6. The dashboard is held in place by three brackets. The brackets are fitted with wing nuts and access can be gained via the glove compartment and air vent holes. Tighten them up by hand to hold the dash in place.
7. Refit the air vents using the extension pieces supplied. Connect in your radio (if required), reconnect the battery and you are finished!
This was copied from http://www.ocoop.com/mini-dashboard.htm
