changing the carb needle
Any time you make any modification to your fuel, intake and/or exhaust system, you will probably need to change your carb needle. Many of the "stage" kits sold by the major Mini suppliers will include an appropriate needle. In the event you don't have a new needle, I have included a link at the end of the article to a chart from Seven Enterprises. Since I'm no expert and this chart may be complete gibberish to you, I'm sure that a helpful salesman would be able to help you if you needed some expert advice.
Changing the needle couldn't be any easier. I have typed up my own tutorial using pictures found around the internet, since I didn't take all the pictures necessary steps. I must thank Asphalt on The Mini Forum for his post on changing the needle which was very helpful.
Changing the needle couldn't be any easier. I have typed up my own tutorial using pictures found around the internet, since I didn't take all the pictures necessary steps. I must thank Asphalt on The Mini Forum for his post on changing the needle which was very helpful.
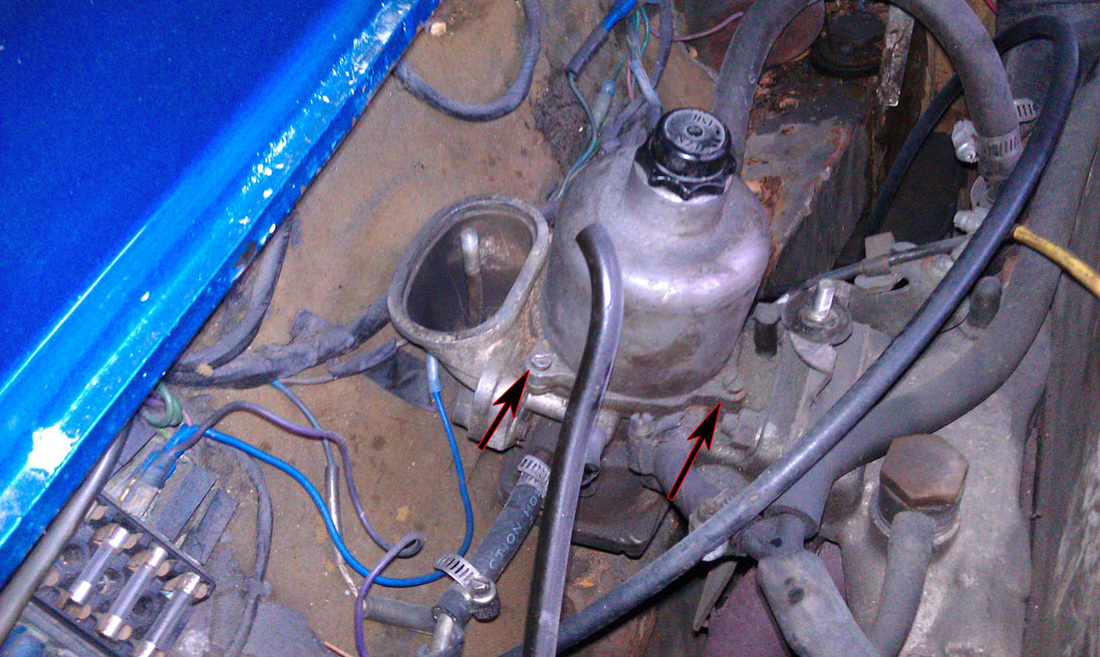
1. After removing the air cleaner assembly (if it obstructs the dashpot), remove the 3 screws that secure the dashpot to the carburetor.
2. Separate the dashpot (which contains a piston) from the carburetor. Be careful removing it because a) there is oil in the piston and b) the needle sticks out the bottom and is slotted in a little hole so you don't want to bend or break it.
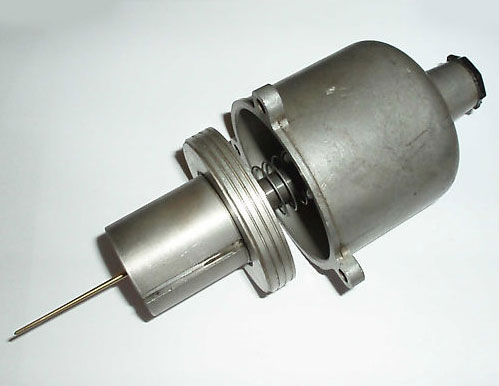
Note: This picture shows the pot slightly disassembled, but these are the parts you will be left with. You can see the needle sticking out the bottom. Also, laying the pot down like this will likely cause oil to spill everywhere.
Note: This picture shows the pot slightly disassembled, but these are the parts you will be left with. You can see the needle sticking out the bottom. Also, laying the pot down like this will likely cause oil to spill everywhere.
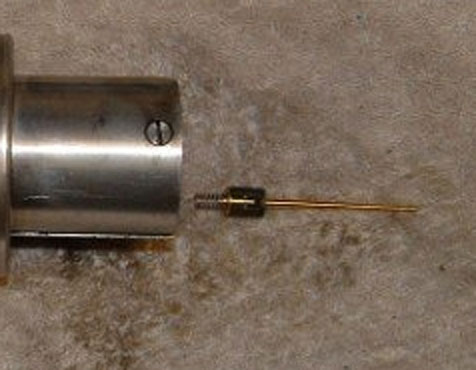
3. Unscrew the screw on the bottom of the piston. This will free the pin and allow you to remove it. It comes out as pictured with a spring on the top and a sleeve with a groove in it.
Note: The pin and sleeve are a snug fit so they shouldn't just fall out. I had a friend hold the dashpot steady and then I wrapped a paper towel around the needle so I could give it a good tug.
Note: The pin and sleeve are a snug fit so they shouldn't just fall out. I had a friend hold the dashpot steady and then I wrapped a paper towel around the needle so I could give it a good tug.
4. The final step is to transfer the sleeve and spring onto the new needle and reverse the procedure. Make sure to line up the groove in the sleeve with the screw in the piston.
carb needle chart
Courtesy of Seven Enterprises at http://www.7ent.com/pages/articles-tech-tips/chart-carburetor-needle.html
